Whether you’re planning a Windows 11 migration or onboarding new machines, applying a custom Windows 11 image starts user devices from a clean, bloatware-free baseline that you set. Creating a Windows 11 image that can be applied to any device model gives you more flexibility and fewer images to maintain. Do more with less work? Heck, yeah.
We’ll walk you through two computer imaging tools you can use to create a Windows 11 image — Microsoft Deployment Toolkit and SmartDeploy.
Building a Windows 11 image with Microsoft Deployment Toolkit
Microsoft Deployment Toolkit (MDT) is a set of free tools that you can use to create a Windows system image. When using MDT to build a Windows 11 image, most of the work is done via MDT’s Deployment Workbench outside an operating system environment. NGL, it’s also pretty manual. We break it down below.
Using MDT Deployment Workbench
With MDT, you first set up and configure all your system and software installer files along with imaging and deployment tasks via the Deployment Workbench — before applying them to a reference machine’s operating system to create the image file. The problem is you won’t know if there are issues until you install everything at the end, and troubleshooting errors can be difficult.
Here’s what the process typically looks like.
Install MDT and set up your MDT server.
Download and install Windows ADK for Windows 11.
Download and configure the Windows 11 ISO.
Configure the latest Windows updates, drivers, and core apps that you want to install on your reference machine later.
Create your task sequence.
Prep your reference machine for image deployment.
Install Windows 11 and apps on the reference machine. Apply settings and configurations.
Test for issues. Troubleshoot by repeating steps 4, 5, and 7 (praying to the IT gods that you don’t have to do this more than once).
Capture your WIM or Windows image.
A manual process
Using MDT involves a lot of time and manual work. Besides downloading and setting up individual drivers and applications, you have to configure your deployment shares and task sequences to carry out software and Windows installation tasks. If you enjoy hardcore tinkering, it’s a dream. Otherwise, this is the point where many sysadmins start questioning their life choices.
“Folks like MDT because it’s free and pretty easy to set up. But it’s also a lot of work each time you want to create and deploy a Windows system image. You spend a lot of time putting together the files, settings, and configurations — all that fun stuff.” — Brook, PDQ’s IT team lead and former MDT user
How to create a Windows 11 image with SmartDeploy
Like MDT, SmartDeploy allows you to create hardware-independent Windows system images — but it requires less fiddling and is easier to use with more intuitive workflows. With SmartDeploy, you start with a reference computer and use it to build your Windows 11 image instead of the other way around.
We’ll break down the five main steps for creating a Windows 11 image:
Build your reference computer.
Install Windows 11 on your reference computer.
Configure Windows 11 and install Windows updates on your reference computer.
Capture your Windows 11 image.
Add driver and application packages with your Windows 11 image.
Physical vs. virtual reference computers
Reference computers can be physical or virtual machines, depending on the type of computer imaging software you use. Besides being easier to maintain, VMs allow you to save on physical storage space (and keep those extra nooks free for midday power naps).
Build your reference computer
You can use SmartDeploy’s Build Wizard to create your virtual reference machine (for VMware Player/Workstation or Oracle VM VirtualBox) — or you can build your VM on the virtualization platform itself (for Microsoft Hyper-V, Citrix, XenServer, or VMware ESXi).
In this example, we use Hyper-V to show you that it’s not as difficult as some might think.
How to activate Hyper-V Manager on your device
Enter Hyper-V in the Windows search field and select Turn Windows features on or off.
Under Windows Features, select Hyper-V.
Restart your machine, and you’re all set.
1. From the Start menu, launch Hyper-V Manager.
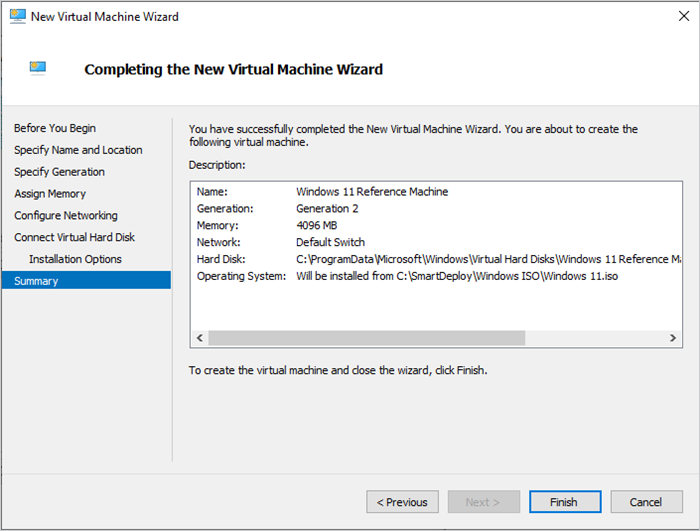
2. Under Actions, select New > Virtual Machine to launch the Hyper-V build wizard.
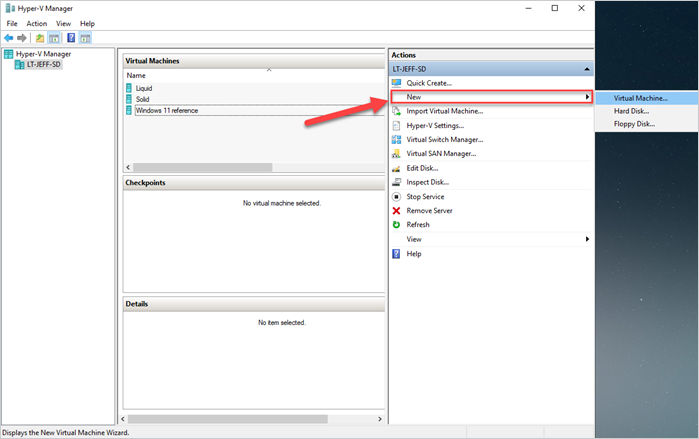
3. Under Specify Name and Location, enter the name of your VM and select your desired file location.
4. Under Specify Generation, select Generation 2 since Windows 11 requires UEFI-based firmware.
5. Under Assign Memory, enter at least 4GB of RAM.
6. Under Configure Networking, set to Default Switch.
7. Under Connect Virtual Hard Disk, assign at least 64GB of disk space.
8. Under Installation Options, select your Windows 11 ISO file.
9. When you’re done, hit Finish.
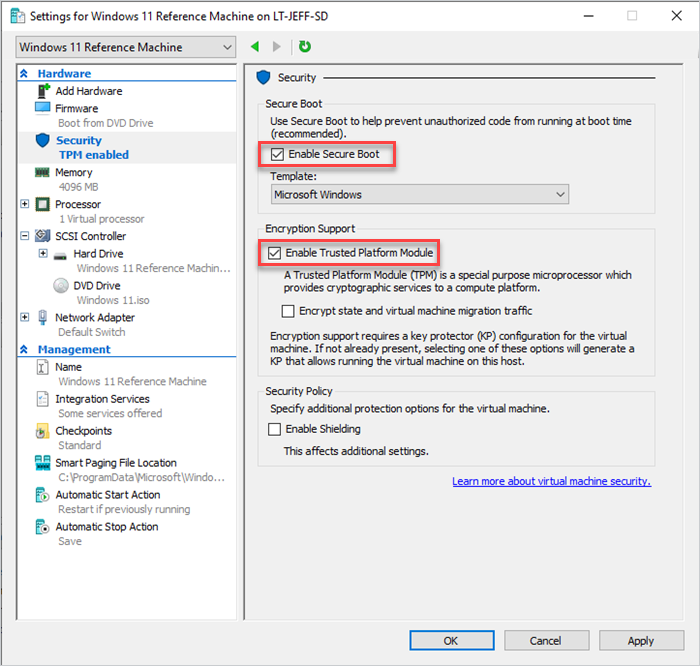
10. In Hyper-V Manager, under Virtual Machines, right-click on the virtual machine you created earlier, and select Settings.
11. Under Security, select Enable Trusted Platform Module. Make sure that Enable Secure Boot is also selected.
12. Under Processor, enter 2 for the number of processors.
13. Under Checkpoints, uncheck Enable checkpoints and hit Apply.
Tips for creating your reference computer
For smoother image capture and deployment, keep these tips in mind when creating your reference computer:
Always start with a blank new virtual machine.
Always use Windows operating system media downloaded from an official Microsoft source.
Instead of in-place upgrades, always do a fresh install of the version of Windows that you want to deploy.
Install Windows 11 on your reference computer
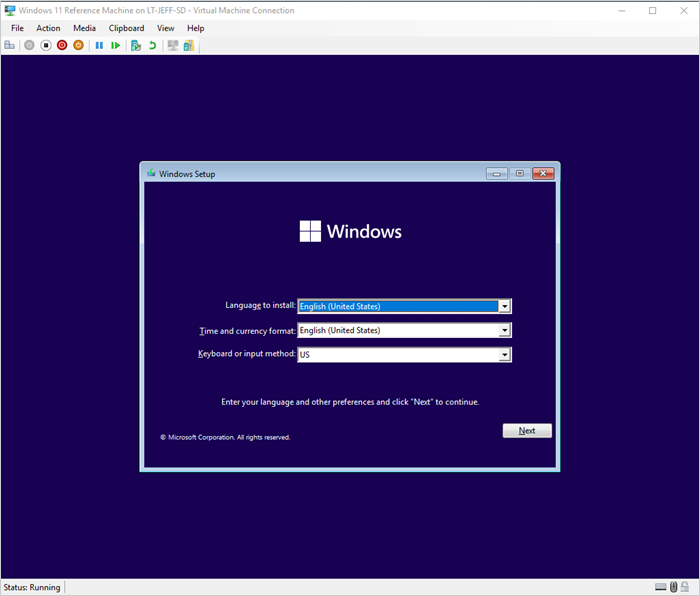
1. From Hyper-V Manager, power on your VM.
2. Select the default settings and hit Next.
3. Select Install to install Windows 11 on the VM. (You don’t need to enter a product key here.)
4. Select Windows 11 Pro.
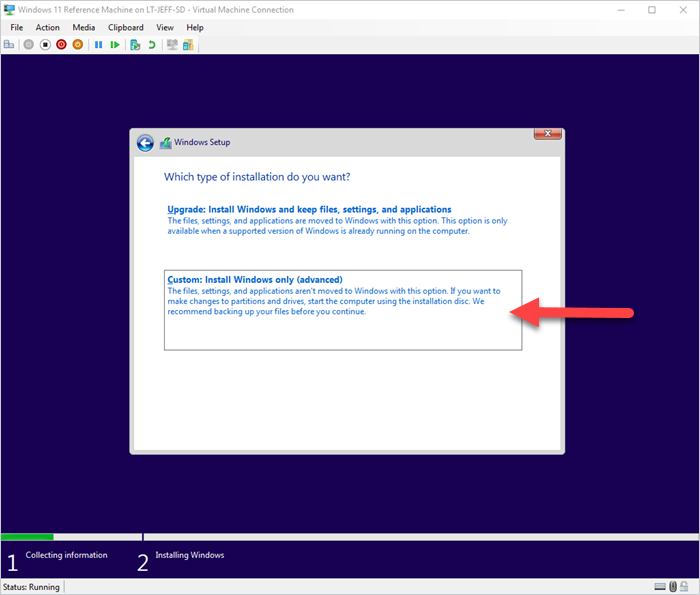
5. Select Custom: Install Windows only (advanced) for a fresh install of Windows.
6. Select your storage location and hit Next.
Configure Windows 11 and install Windows updates on your reference computer
1. Configure your Windows 11 language, location, and keyboard settings.
How to set up an offline account on your reference computer
When configuring Windows 11 on your reference VM, select Set up for work or school.
At the sign-in screen, select Sign-in options, and select Domain join instead.
Enter an offline account name but skip the password.
Select default privacy settings. (These get reset during imaging anyway.)
2. Windows 11 will automatically check for and run the latest Windows updates (while you perfect your screen surfing skills).
3. Follow the Windows 11 setup wizard to the end.
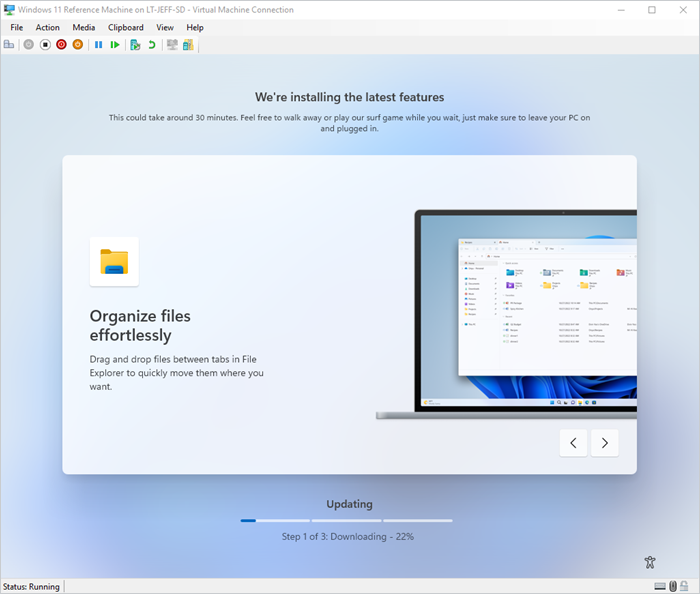

Even though Windows 11 automatically runs updates when it installs, we still recommend pulling up the Windows Update utility in your VM to check for updates that were missed earlier. (If IT folks have trust issues, you know why.)
4. Once you're done with Windows updates, you can install any core apps that apply to all your target machines (except antivirus or third-party security software). Or, you can also slipstream prebuilt application packages with your Windows 11 image. (Refer to the last step in this section.)
Capture your Windows 11 image
Once you’ve created your reference VM and installed Windows 11, you’re ready to capture your Windows 11 image in SmartDeploy.
1. Launch SmartDeploy.
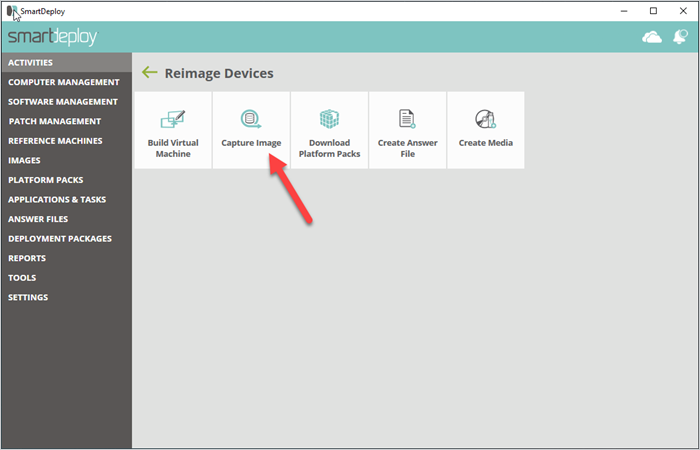
2. From the SmartDeploy console, go to Activities, click Reimage Devices, and select Capture Image.
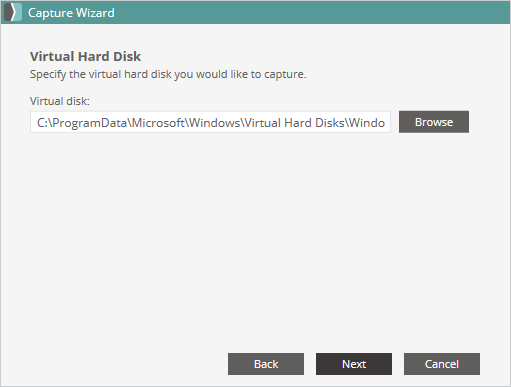
3. From the Capture Wizard, select your Windows 11 virtual hard disk.
4. Select a name and location for your .WIM image file.
5. Click Finish.
Add driver and application packages with your Windows 11 image
SmartDeploy comes with prebuilt application packages and driver packages (also called Platform Packs) that you can easily download and deploy with your Windows 11 image to different devices.
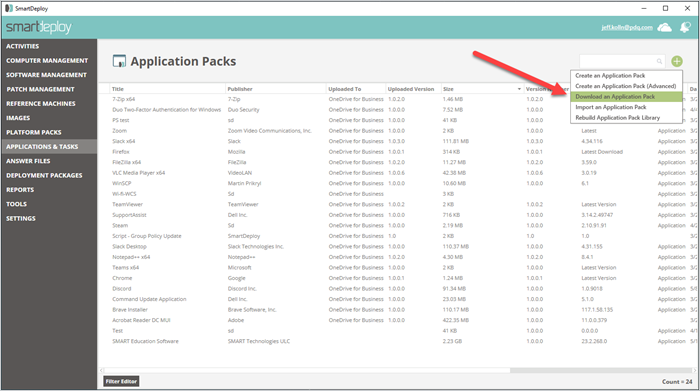
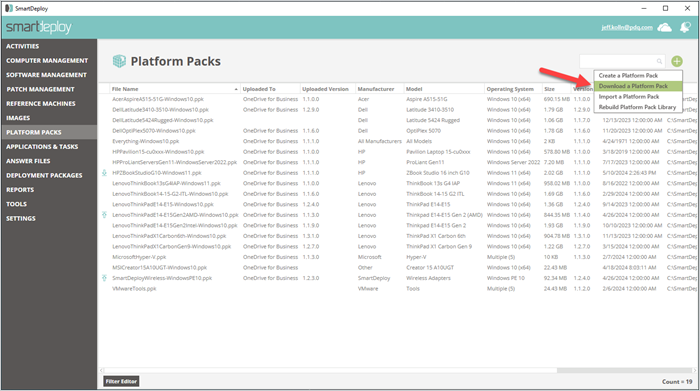
Plus, packages are managed and kept up to date by SmartDeploy technicians, saving you the legwork so you can leave work on time for once. Via the SmartDeploy console, you can also customize packages or make one from scratch. Perfect for when you need to impress your coworkers with your tech wizardry.
Many thanks to Jeff Kolln, PDQ sales engineer and SmartDeploy extraordinaire, for his invaluable input and feedback on this section.
Best practices when creating a Windows 11 image
When creating your Windows 11 image — no matter what imaging tool you’re using — consider these best practices.
Install the latest Windows updates
Don’t install antivirus software or third-party security software
Leave out sensitive data or user data
Don’t install apps that pull hardware information
Test your Windows 11 image before deploying
Unless you’re managing only a handful of machines, we recommend using computer imaging software to make life easier for yourself. When choosing computer imaging software, it’s important to consider your use case and business needs above all else.
With the right computer imaging tool, you can save hours of tedious work and budget-busting overheads, scaling quickly if needed. You might even earn the coveted title of management’s favorite IT admin.
How to create a Windows 11 image FAQs
What’s the difference between a system image and a backup?
The main difference between a system image and a backup is their intended purposes. A system image is an operating system environment with specific configurations to be distributed across devices. A backup image is used to restore a specific machine to a particular state at a specific point in time (when the image was captured).
Can you use Windows Autopilot or Microsoft Intune to create a Windows 11 image?
No, you cannot use Windows Autopilot or Microsoft Intune to create a Windows 11 image — or any system image, for that matter. You can use Autopilot to preconfigure the OEM operating system on new devices. Intune is a cloud-based endpoint management solution you can use to enforce policies and manage user devices and what they have access to.
Besides simplifying computer imaging and deployment workflows, SmartDeploy is just as useful for streamlining post-imaging tasks like updating device drivers and managing Windows updates across on-prem and remote devices. Explore the full range of features and functionalities with a free 15-day trial.

